Tutorials
Step by Step Diamond Painting Instructions
Enter the realm of Diamond Painting, a calming, artistic pastime that allows you to create beautiful, glittering masterpieces effortlessly! If you are a beginner or wanting to brush up on your skills, this Step by Step Diamond Painting guide will assist you in maximizing your enjoyment of diamond dot painting. Follow these diamond painting instructions to discover how to turn your blank diamond painting canvas into a stunning work of art.
What Is Diamond Painting?
Diamond Painting combines cross-stitch and paint by numbers techniques by placing small, shiny gem-like “diamonds” on a pre-printed canvas instead of using paint. These diamonds stick to your canvas with a pre-installed adhesive, making a shimmering masterpiece. The activity is both soothing and satisfying, making it an excellent pastime for anyone wanting to relax and produce something lovely.
Step by Step Diamond Painting Guide
Find The important 6 Diamond Painting Steps guide below:
Step 1: Prepare Your Workspace and Canvas
If this is your first time, ensure you select a comfortable well lit area to work in, open up the canvas on a flat surface and even out any creases by laying heavy books over the corners for some hours. But they can go smoothly – if you prepare in advance carefully!
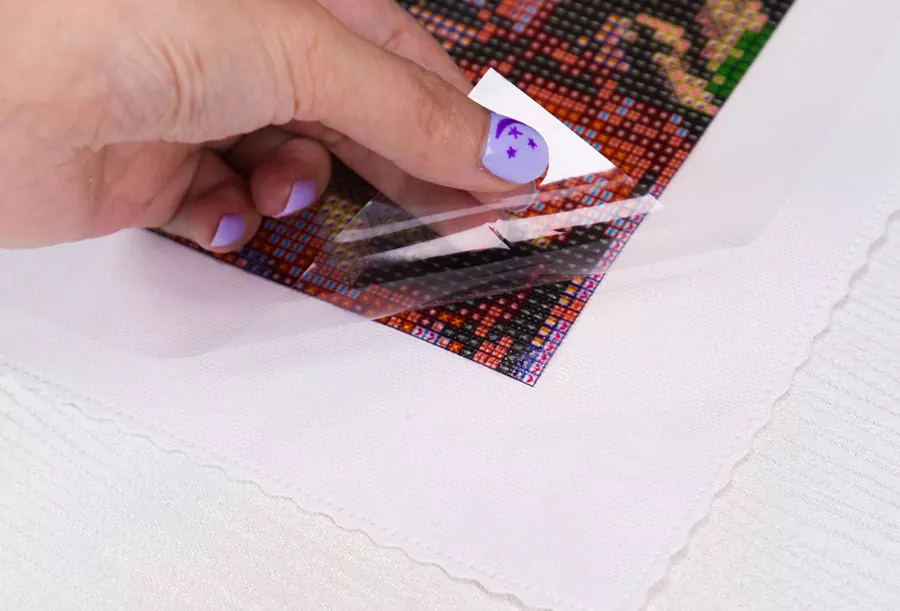
Peel back a small corner of the clear protective film, covering the sticky adhesive on your canvas. You don’t want to pull too much of the film back at once, as you only want to expose the bit that you are working with immediately so foreign particles do not get stuck to it.
Step 2: Select a Symbol to Work On
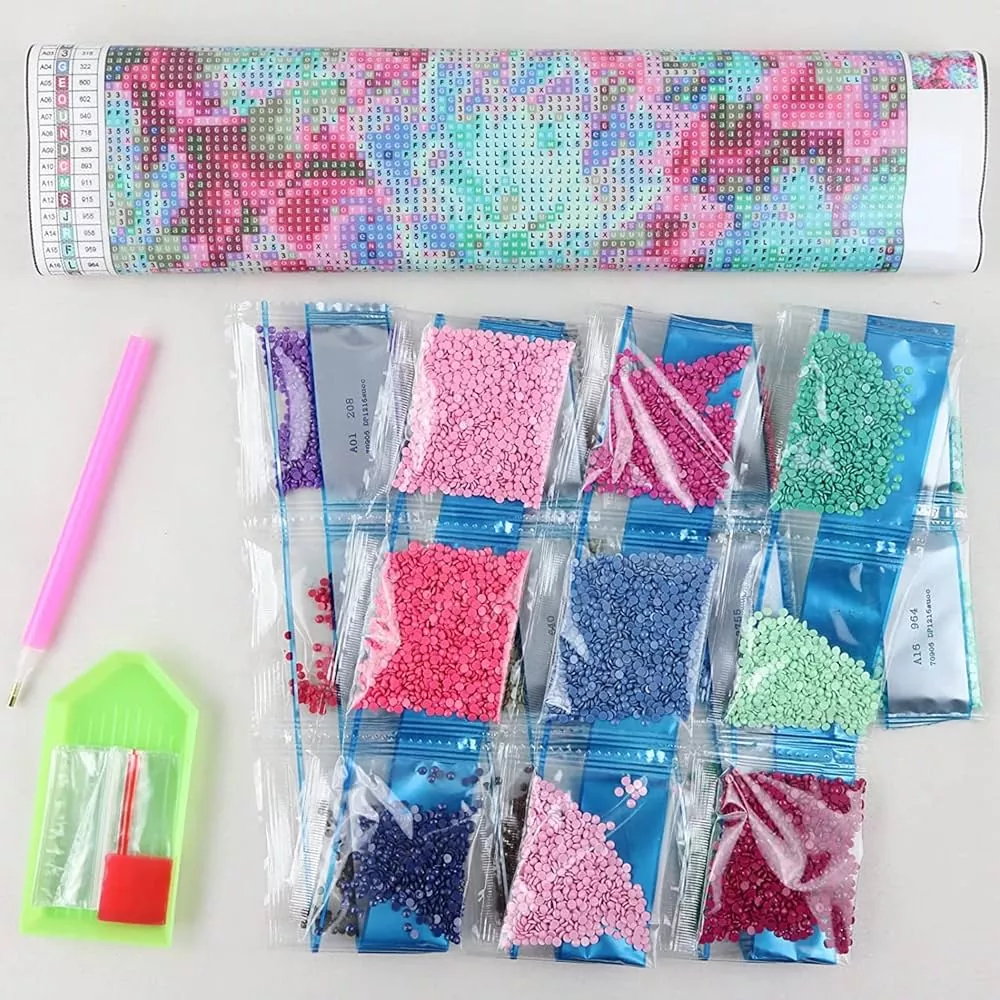
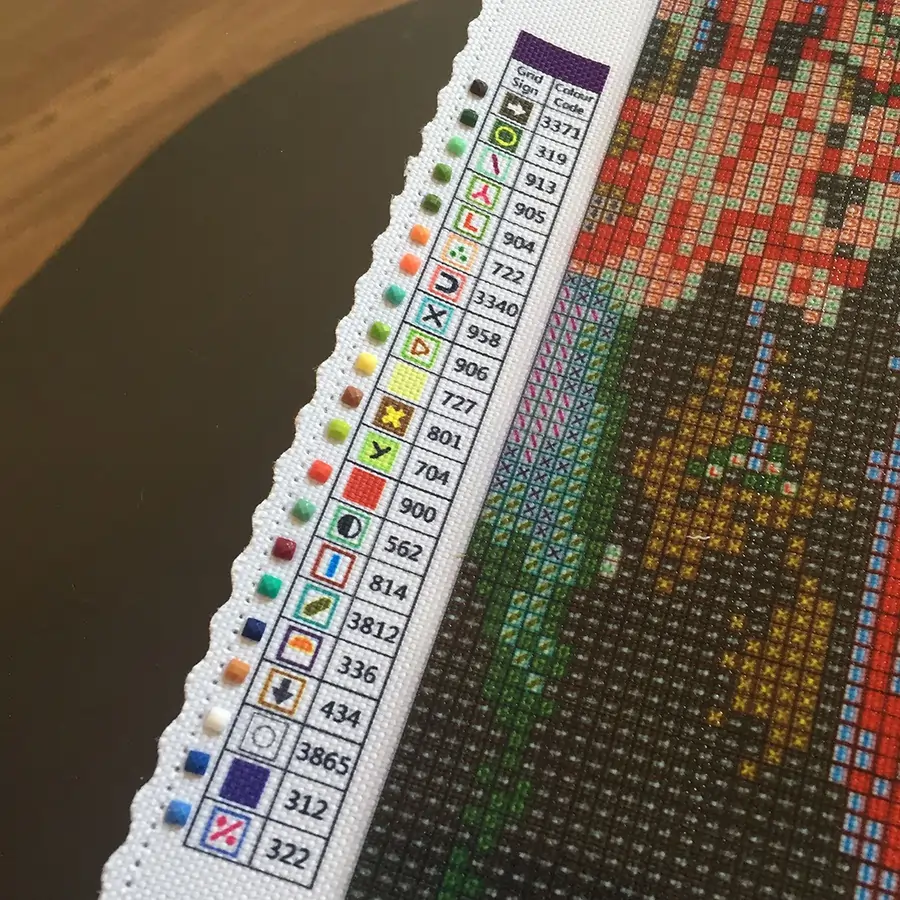
Take a moment to observe your canvas. You’ll see that it’s split into various sections, each labeled with different symbols, numbers, or letters. These markings represent specific diamond colors. Start by picking a small section or symbol to focus on. This approach keeps things more manageable and prevents you from feeling overwhelmed by trying to tackle too much at once.
Step 3: Locate the Corresponding Diamonds
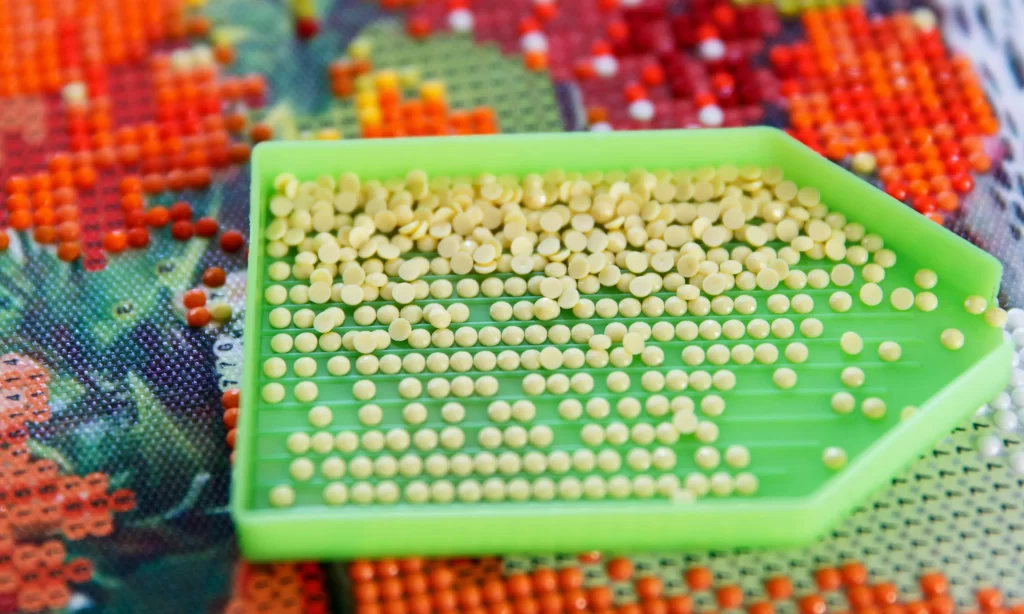
Once you’ve picked the area you want to work on, look for the matching diamond color. Use the legend on the side of your canvas to figure out which diamond bag corresponds to the symbol you selected. The diamonds are packed in small bags, each one labeled with a number or code that matches the diamond painting symbols on your canvas.
Pour a few diamonds into the grooved tray provided. Gently shake the tray from side to side, which will help the diamonds settle with their flat side down, making them easier to pick up.
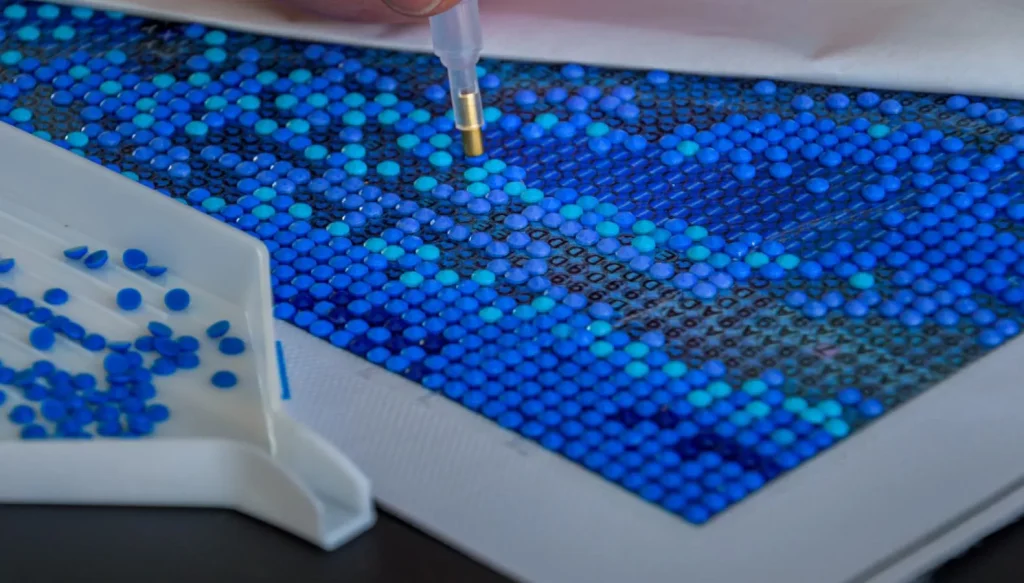
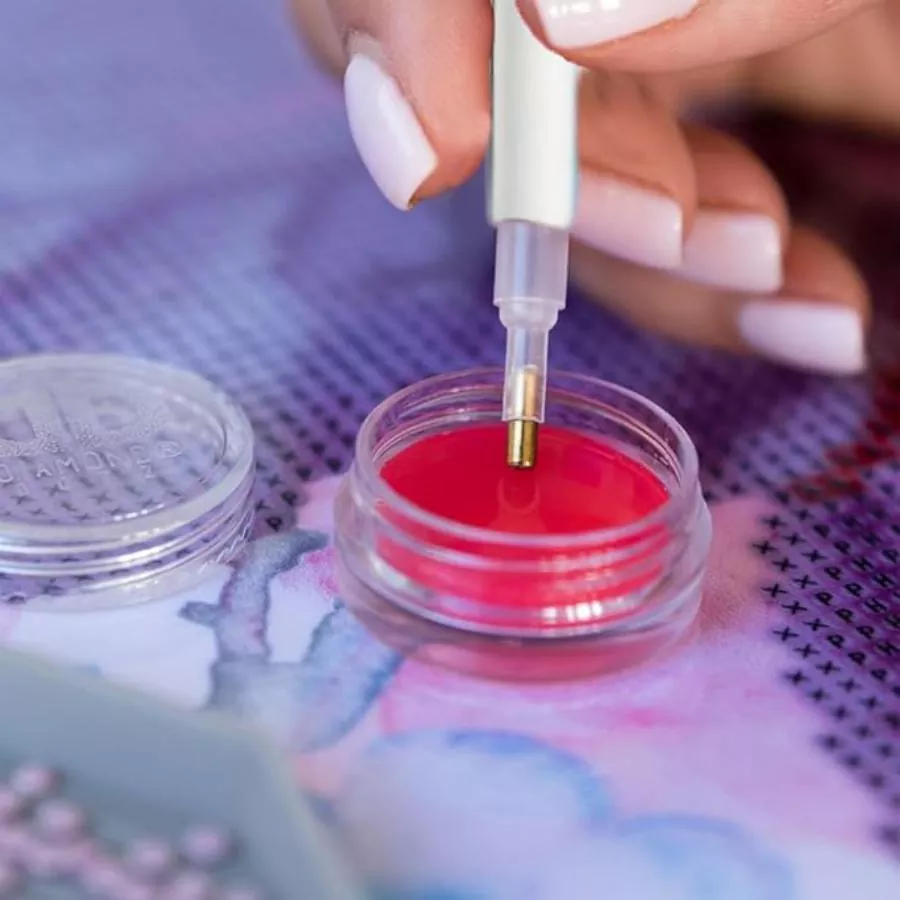
Step 4: Load Your Applicator with Wax/Putty
To pick up the diamonds, you’ll first need to load your diamond painting applicator pen with wax or putty. Take the pink wax that came with your diamond paint kit, and peel off the plastic cover from one side. Press the metal tip of your applicator pen into the wax until it’s filled. The wax for diamond painting makes it easier for the pen to grab onto the diamonds.
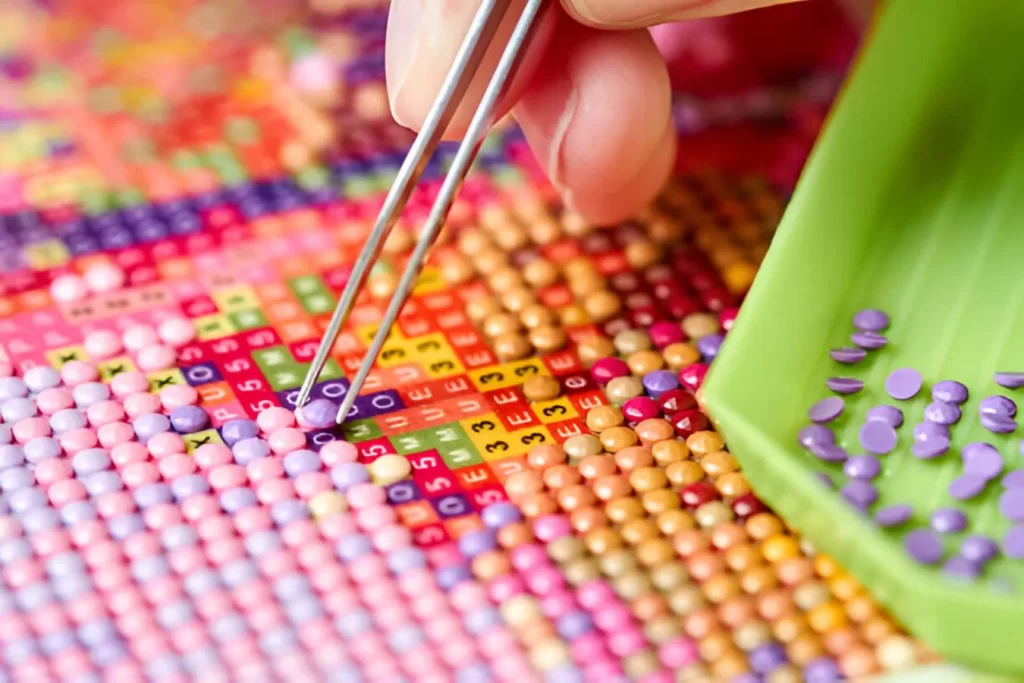
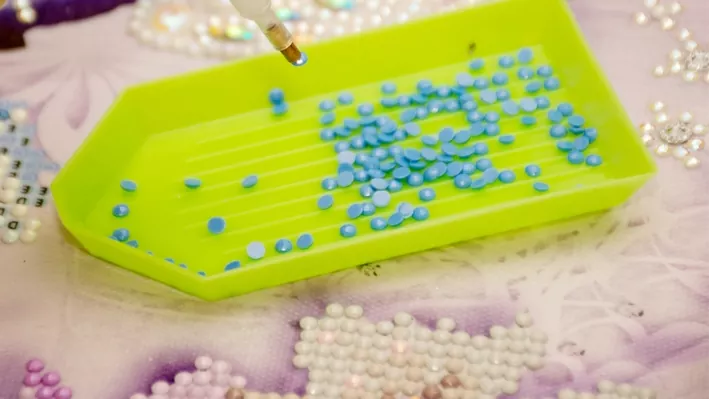
Step 5: Pick Up the Diamonds
Now that your applicator is ready, you can start placing the diamonds! Gently press the tip of your applicator pen onto the faceted side of a diamond. The diamond should stick to the pen, making it easy for you to position it exactly where it belongs on the canvas.
Step 6: Place the Diamonds on the Canvas
Carefully align the diamond over the matching symbol on your canvas, then press it down gently. Keep repeating this for each diamond, focusing on one symbol at a time until you’ve finished that section.
You can work in rows, blocks, or even by color, whatever feels easiest for you. Just be sure to peel back the protective film a little at a time, so the adhesive stays fresh as you work.
After Following the Step by Step Diamond Painting take a look at these tips for a greater result.
Key Tips for an Enjoyable Diamond Painting Experience
Work in Small Sections: Tackle one area of the canvas at a time, peeling back just enough film to cover that section. This helps prevent the adhesive from drying out and keeps your project manageable.
Use the Tray: When working with diamonds, use the grooved tray to help keep them organized. A gentle shake will align the diamonds flat-side down, making them easier to pick up with the applicator.
Keep the Canvas Clean: When you’re not actively working on your canvas, always cover it back up with the protective film to avoid any dust or dirt sticking to the adhesive.
Stay Organized: Consider using small containers to store your diamonds. This keeps your colors separated and prevents spills. You can label the containers with the corresponding symbols or numbers for easy reference.
Ensure Diamonds Stick: After placing a diamond, press down gently to ensure it adheres properly to the adhesive. A rolling pin or diamond painting roller can help smooth out the canvas and secure all the diamonds once you’ve completed a section.
Why Diamond Painting is the Perfect Hobby
Diamond Painting is not just an art, it is also a way of mindful and calm meditation whereby you can create beautiful pieces of arts with only slight effort. The repetitive nature of diamond placement can serve as good stress relief, so it is a great way to relax after the busy day. You also get a shiny project to show off at the end!
People of all ages will enjoy the chance to increase concentration and fine motor skills through diamond painting. This activity is never a dull one, whether you’re doing it solo or having fun with friends and family; diamond painting is the perfect creative expression outlet.
Ready to Begin?
After reading the Step by Step Diamond Painting guide, it’s already clear how easy is to learn and relax. If you’re ready to start your journey or are looking for new kits to add to your collection, explore our latest designs.